
 DJI Ronin-S In-Depth Series – Part 2 – Operation
Following our previous post on the setup of the new DJI Ronin-S, we’re continuing our in-depth series with a look at the operation and shooting modes available on this outstanding gimbal.
You can use the Ronin app or the built-in joystick and buttons to control the Ronin-S, change modes and capture photos and videos.
In this post, we will show you the operating and shooting modes available on the Ronin-S and how to achieve the best results with each.
Keep reading to find out how you can achieve the best results with your stabiliser.
Check out our video review below for more details:
DJI Ronin-S In-Depth Series – Part 2 – Operation
Following our previous post on the setup of the new DJI Ronin-S, we’re continuing our in-depth series with a look at the operation and shooting modes available on this outstanding gimbal.
You can use the Ronin app or the built-in joystick and buttons to control the Ronin-S, change modes and capture photos and videos.
In this post, we will show you the operating and shooting modes available on the Ronin-S and how to achieve the best results with each.
Keep reading to find out how you can achieve the best results with your stabiliser.
Check out our video review below for more details:
Head to our previous post from the in-depth series on the DJI Ronin-S here and see how to set up the gimbal.
DJI Ronin-S Operating Modes
There are three handheld operating modes available on the DJI Ronin-S; Upright, Underslung and Flashlight. When the extended grip is attached, you can choose to hold the Ronin with one or two hands, useful when shooting with the Ronin-S for long periods. In addition to the above handheld modes, there are also options available to use the built-in tripod or to mount the Ronin-S. Check out each of the individual modes below.Upright Mode
The standard operating mode on the Ronin-S, Upright allows you to use one or two hands to control the gimbal. This is used for a wide range of shots both stationary and on the move. You can choose to have the camera on your subject or alternatively, on yourself for a piece to camera scene typically used in a vlog. DJI Ronin-S Upright Mode
Flashlight Mode
Flashlight Mose is where the Ronin-S is held horizontally with the camera facing out. It can offer added stability when capturing motion shots as well as advanced shots like a barrel roll. DJI Ronin-S Flashlight Mode
To enter Flashlight, press and hold the trigger button and move until the gimbal is horizontal as shown below:
DJI Ronin-S Flashlight Mode
To enter Flashlight, press and hold the trigger button and move until the gimbal is horizontal as shown below:
Underslung Mode
Underslung allows you to get close to the ground for a low shot of your scene.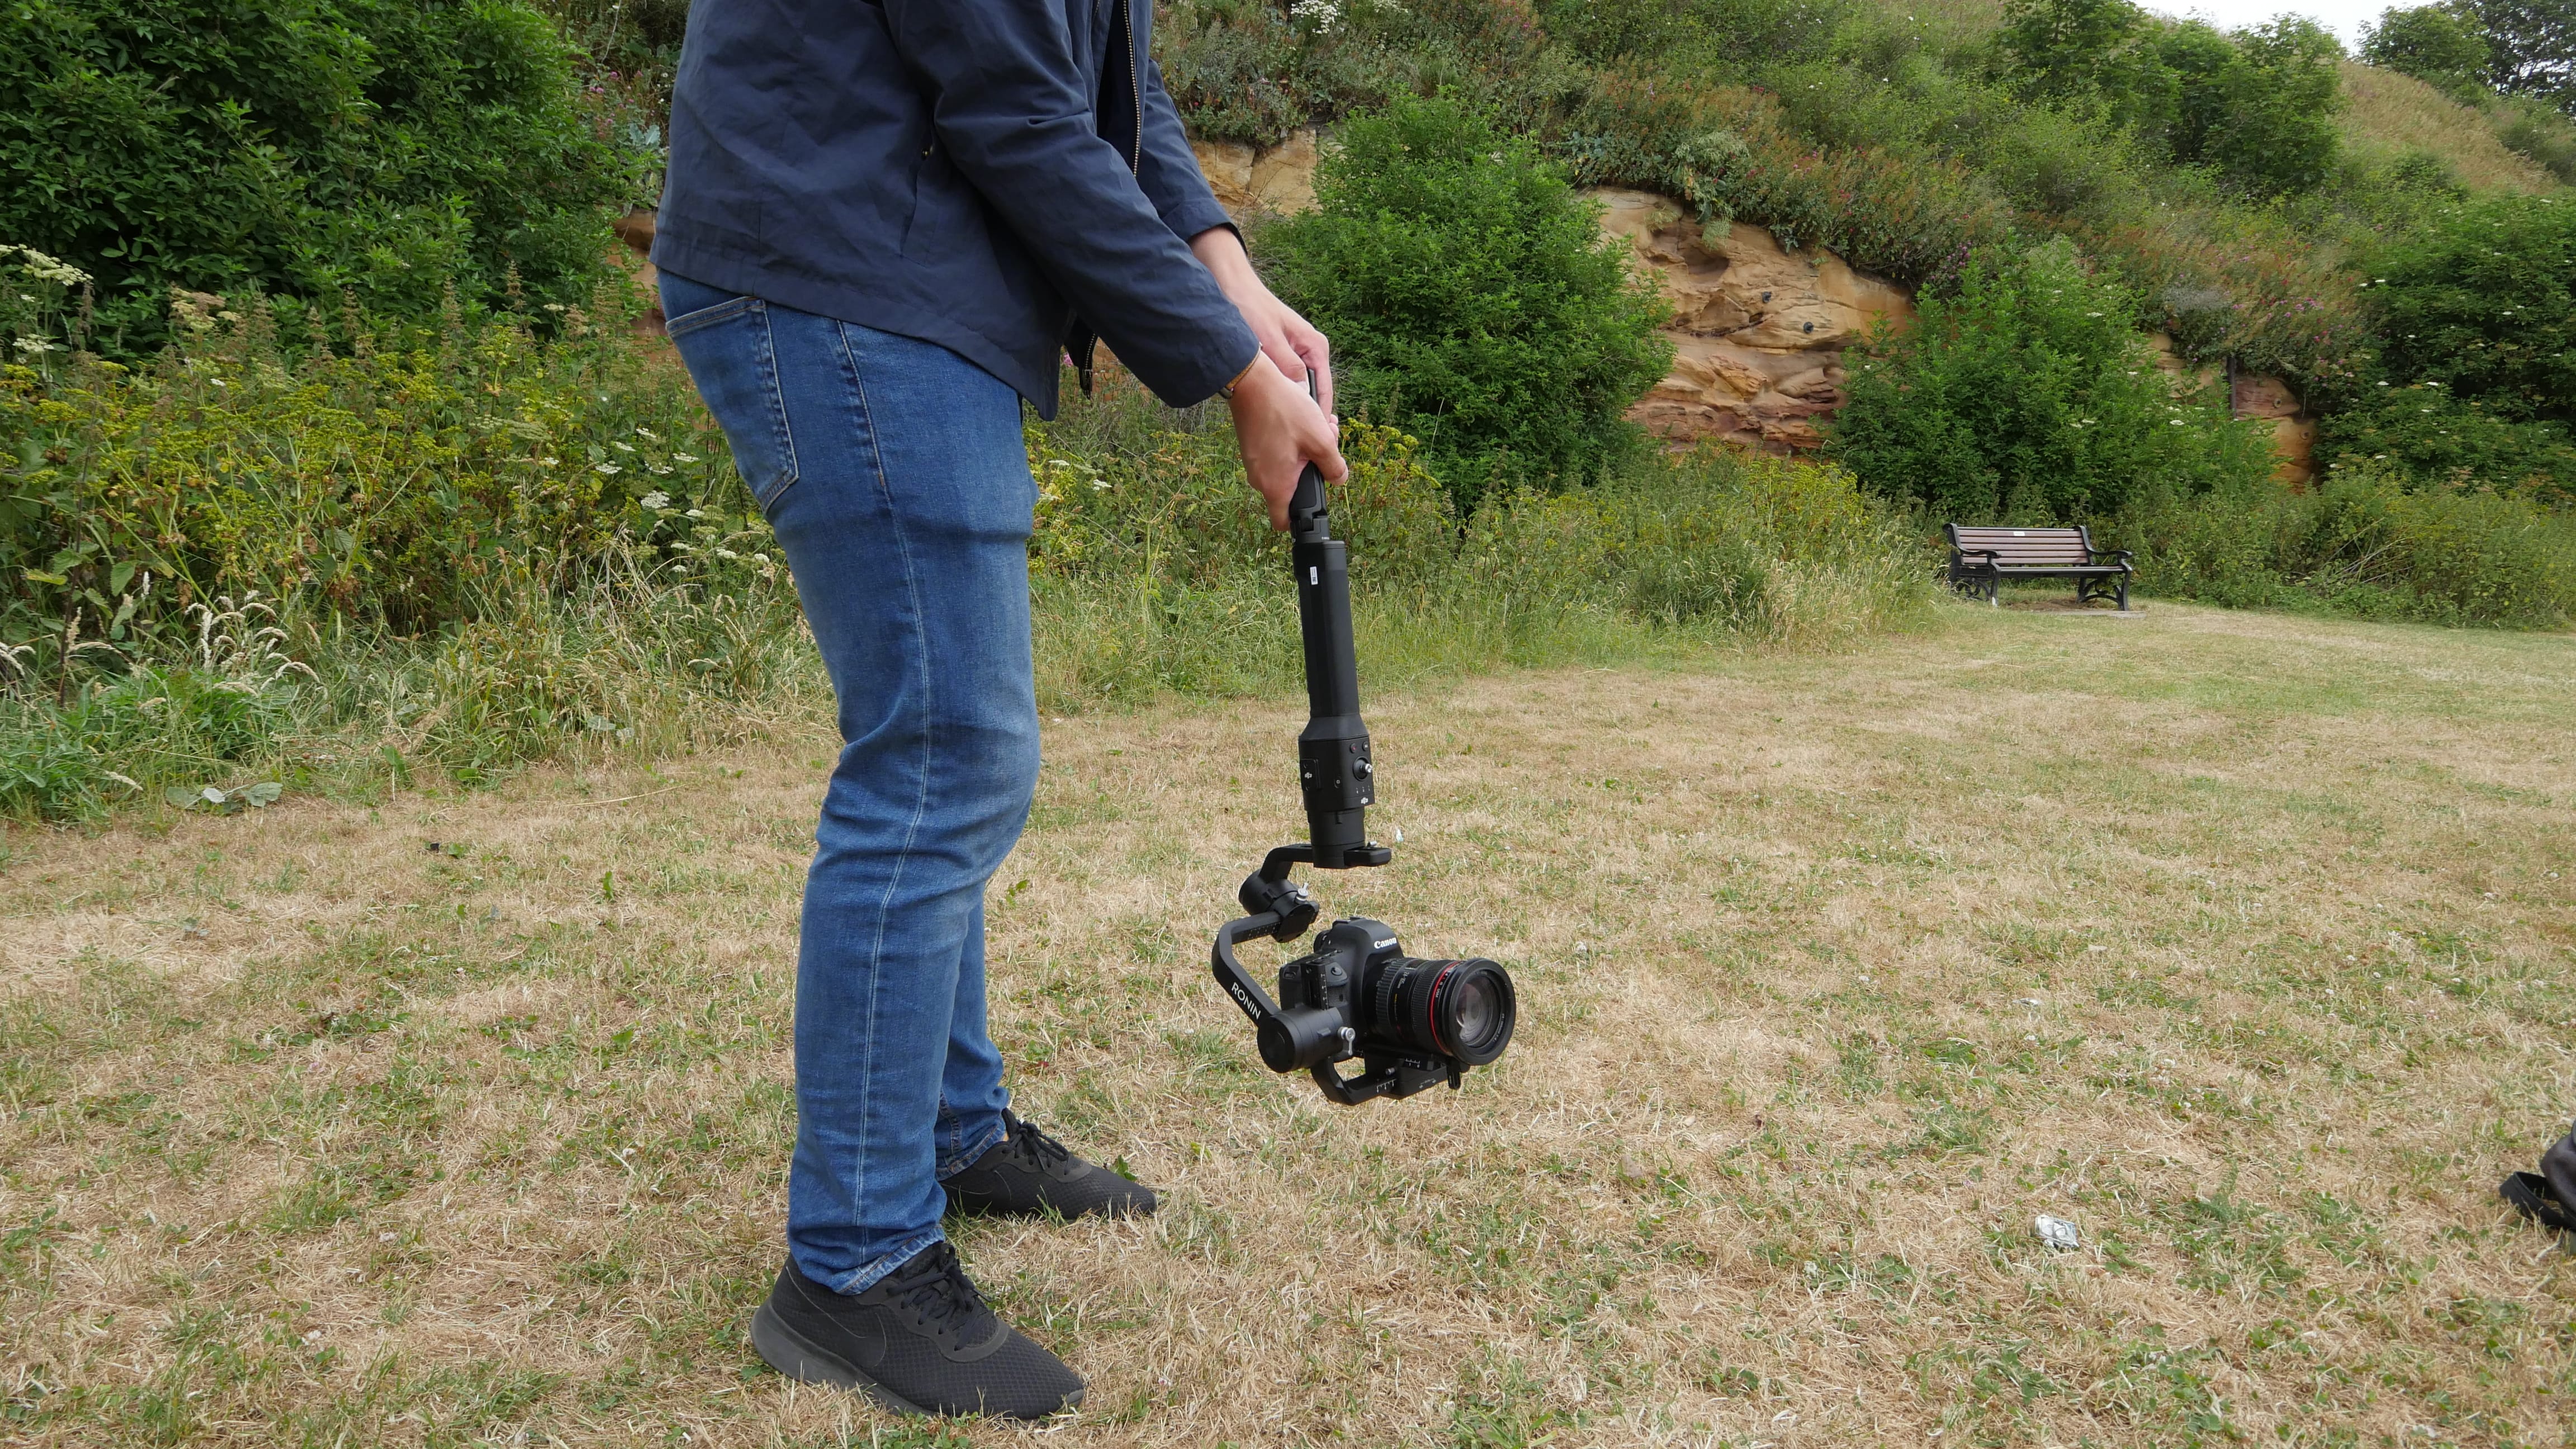 DJI Ronin-S Underslung Mode
To enter Underslung, there are two methods. You can either use the trigger and rotate the Ronin-S until it’s upside down:
Alternatively, pause the motors and face the Ronin to the ground. Then, turn the roll axis to turn the camera upside down and reactivate the motors.
DJI Ronin-S Underslung Mode
To enter Underslung, there are two methods. You can either use the trigger and rotate the Ronin-S until it’s upside down:
Alternatively, pause the motors and face the Ronin to the ground. Then, turn the roll axis to turn the camera upside down and reactivate the motors.
Built-in Tripod
You can also use the built-in tripod with your Ronin-S. This allows you to set the gimbal down for stationary shots or a Timelapse. It's also beneficial if you want to control the Ronin using the Ronin app or a controller like the DJI Master Wheels or Force Pro. DJI Ronin-S Built-In Tripod
Mounting the Ronin-S
Finally, the Ronin-S features a ¼ 20” thread, a 3/8 16” thread and an M4 mounting hole. These allow you to mount the Ronin on a huge range of accessories including tripods, jibs, car mounts, etc. DJI Ronin-S Tripod Mount
DJI have tested the Ronin-S to speeds of up to 75 kph (handheld). Use with care if you’re car mounting the Ronin-S and slowly increase the speed while monitoring performance.
If mounting on a car, remember to change the mounting mode in the ‘General’ section in the Ronin app and increase the stiffness of the motors.
It’s also worth noting, the camera mounting plate used on the Ronin-S is compatible with tripod manufacturers like Manfrotto, increasing the adaptability into a huge range of workflows.
DJI Ronin-S Tripod Mount
DJI have tested the Ronin-S to speeds of up to 75 kph (handheld). Use with care if you’re car mounting the Ronin-S and slowly increase the speed while monitoring performance.
If mounting on a car, remember to change the mounting mode in the ‘General’ section in the Ronin app and increase the stiffness of the motors.
It’s also worth noting, the camera mounting plate used on the Ronin-S is compatible with tripod manufacturers like Manfrotto, increasing the adaptability into a huge range of workflows.
DJI Ronin-S Shooting Modes
The Ronin-S features several pre-planned modes to help you capture a range of photos and videos. The modes are available through the Ronin app under the Create section. The interface below demonstrates the options available to you: Ronin App - Create
Some of the modes do look complicated at first glance but are simple to use once you get used to the controls. If you've used the DJI Ronin 2, the majority of modes will be familiar as they operate in a similar way.
Ronin App - Create
Some of the modes do look complicated at first glance but are simple to use once you get used to the controls. If you've used the DJI Ronin 2, the majority of modes will be familiar as they operate in a similar way.
Capture
Capture is the standard photo and video mode used to remotely control the Ronin using your smartphone and the DJI Ronin app. This mode is useful when using either the built-in or an external tripod. The app has several options available once you’ve connected to the Ronin-S. You can control the below areas within the menu using its simple interface. Ronin App - Capture
Control Dial – Depending on the mode, you can change the Max Speed or Smoothing of the movements on the Ronin-S.
Roll Stick – Virtual joystick to control the roll on the Ronin-S.
Pan/Tilt Stick – Virtual joystick to control the pan and tilt on the Ronin-S.
Shutter/Record – Start/stop recording or take a photo.
Photo/Video Toggle – Switch between the video and photo modes on the Ronin-S.
Ronin App - Capture
Control Dial – Depending on the mode, you can change the Max Speed or Smoothing of the movements on the Ronin-S.
Roll Stick – Virtual joystick to control the roll on the Ronin-S.
Pan/Tilt Stick – Virtual joystick to control the pan and tilt on the Ronin-S.
Shutter/Record – Start/stop recording or take a photo.
Photo/Video Toggle – Switch between the video and photo modes on the Ronin-S.
Panorama
The Ronin-S allows users to capture the individual images used in a panorama shot automatically. Once captured, the images will have to be stitched in an editing suite. A range of ±45° is available for the tilt to avoid showing the gimbal and a full pan rotation of 360°. With the Panorama Mode, you’re able to create impressive results like the below: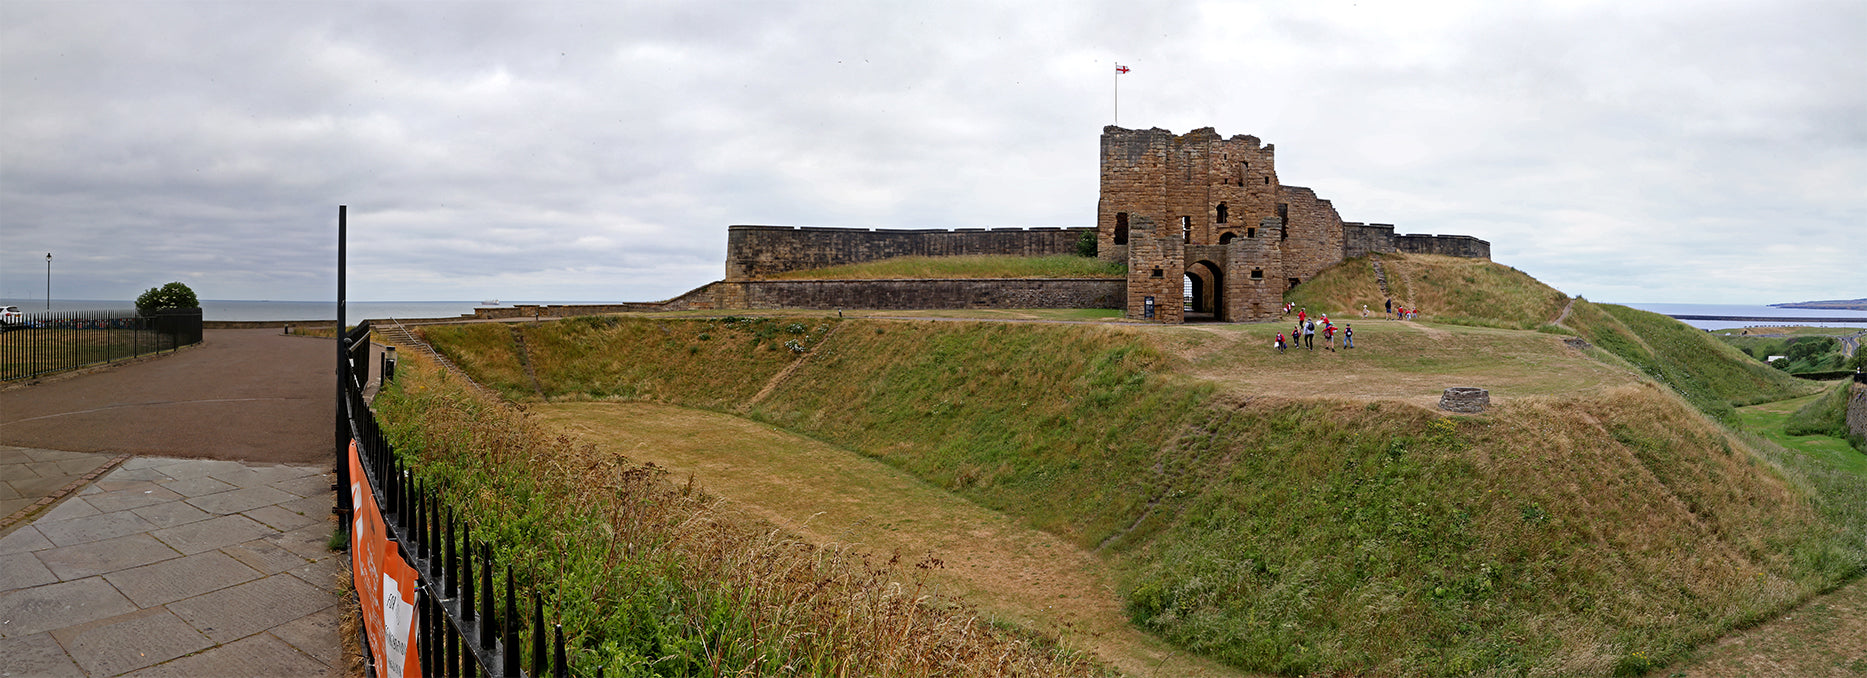 DJI Ronin-S Panorama Shot
Within the Ronin app, several areas can be set according to your camera and desired image.
DJI Ronin-S Panorama Shot
Within the Ronin app, several areas can be set according to your camera and desired image.
 Ronin App - Panorama
Sensor Type – Input the sensor type of your camera.
Focal Length – Input the focal length of your camera.
Overlap – Input the desired overlap of your images.
Delay – Input the delay between each photo captured. A greater delay will result in more detail in your image.
Once the above settings have been input, use the grid to mark the range of the panorama by dragging the dots in the corners. The camera icon will show the camera’s position within the grid.
The grid will display the path of the camera during the panorama.
Ronin App - Panorama
Sensor Type – Input the sensor type of your camera.
Focal Length – Input the focal length of your camera.
Overlap – Input the desired overlap of your images.
Delay – Input the delay between each photo captured. A greater delay will result in more detail in your image.
Once the above settings have been input, use the grid to mark the range of the panorama by dragging the dots in the corners. The camera icon will show the camera’s position within the grid.
The grid will display the path of the camera during the panorama.
Timelapse
Another option available on the Ronin app is the Timelapse Mode. In Timelapse, you set parameters and the Ronin-S will automatically capture images to create a timelapse shot. Like with the Panorama, images require manual merging in post-production to create a timelapse effect. To capture a Timelapse, you must input the interval and content durations as well as your desired frame rate. You are also able to activate the Push Mode to manually move the camera in your Ronin-S.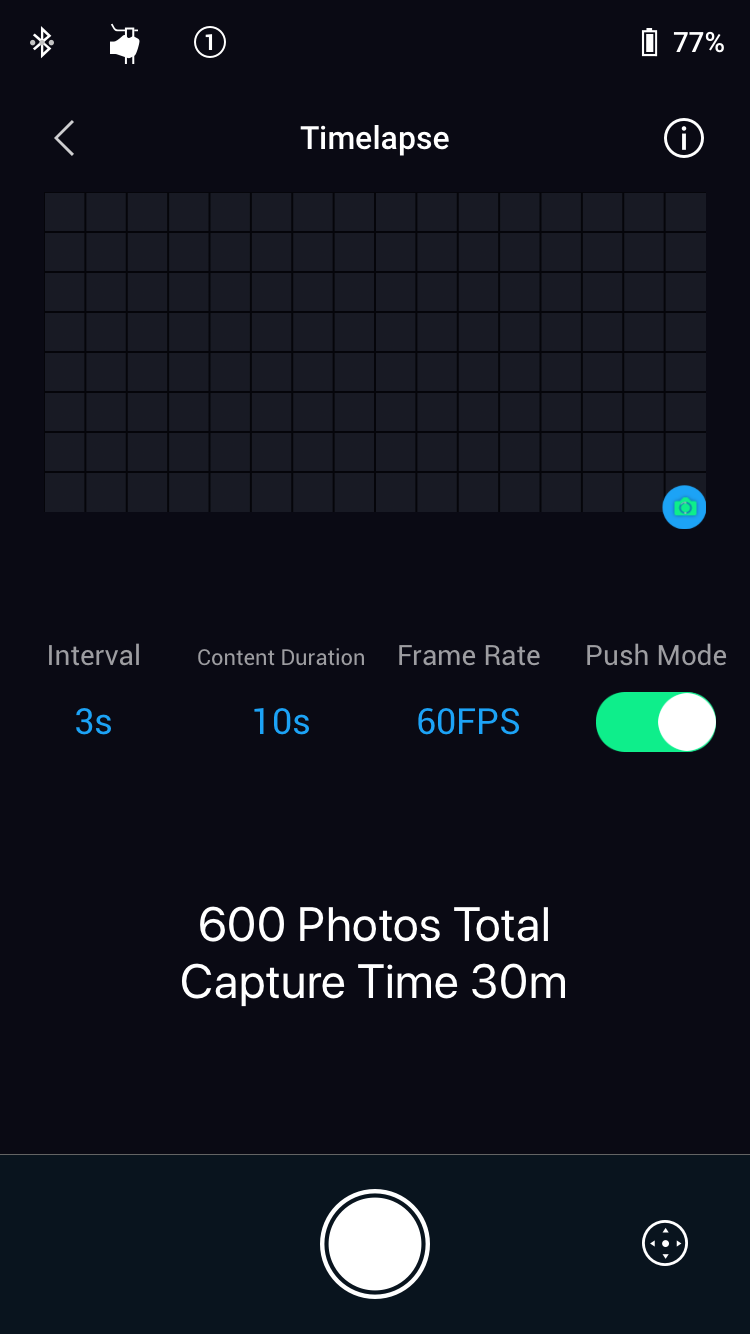 Ronin App - Timelapse
Once you choose your settings, the Ronin will advise the number of photos it will take and the duration. Then, just let the Ronin-S do the rest.
Ronin App - Timelapse
Once you choose your settings, the Ronin will advise the number of photos it will take and the duration. Then, just let the Ronin-S do the rest.
Motionlapse
Motionlapse allows you to create a moving Timelapse which moves between five designated points for an interesting result: To set up the Motionlapse, select the waypoint and move the camera to the desired point by hand or using the virtual joystick. To add the next point, tap the previous waypoint and the ‘+’ symbol to the right of the grid, then follow the same technique to drop it in place. Ronin App - Motionlapse
You can also control the interval and content duration as well as the frame rate like in the Timelapse Mode.
Once you’ve set all the points, use the bottom left preview to watch the camera’s path then click the record button to begin the Motionlapse.
Manual image processing will also be required following this mode.
Ronin App - Motionlapse
You can also control the interval and content duration as well as the frame rate like in the Timelapse Mode.
Once you’ve set all the points, use the bottom left preview to watch the camera’s path then click the record button to begin the Motionlapse.
Manual image processing will also be required following this mode.
Track
The Track Mode is similar to the Motionlapse, however, utilises the video camera. It also features a greater number of waypoints and gives more creative freedom with duration of the movement and pauses in your shots. This mode is great for creating repeatable shots to let users create different takes, ideal for more advanced users with high demands from their kit. The Track feature can also be used in conjunction with a slider or buggy etc. giving even greater flexibility to the needs of the user. To set up the Track feature, set a waypoint on the grid feature, then apply the duration between points as well as the stay time. Up to ten waypoints are available in this feature. Ronin App - Track
Once you’ve set your points, preview the feature or begin your shot.
Ronin App - Track
Once you’ve set your points, preview the feature or begin your shot.
Sport Mode
Sport Mode will allow you to keep up with a fast-moving subject by increasing the responsiveness of the Ronin. It is available when using the Ronin-S in any of the profiles. Check out the example of the mode below: To enter Sport Mode, simply hold the mode button and wait for the indicator to go yellow. To exit, just release the button and the Ronin-S will return to your previous mode. DJI Ronin-S Port Mode
Roll 360
As we mentioned above, the Ronin-S is capable of capturing a barrel roll shot, dubbed by DJI, Roll 360. This is a popular shot in feature films, where the camera turns, rotating the scene as shown below: In order to use the Roll 360, you must use the Ronin-S in the Flashlight Mode. To set up The Ronin, enter the Ronin app and go to Configuration, Control Settings and then Channels. You then need to map the CH3 to the roll and CH1 to N/A. Then, hold the Ronin-S in the Flashlight position and re-centre the camera to face forward. You can then use the joystick to rotate the camera in either direction, changing your speed as desired.Summary
The DJI Ronin-S is the perfect tool for vloggers and videographers utilising their DSLR or mirrorless camera for filmmaking. It helps users create perfectly stabilised footage without the limitations of similar gimbals on the market. The operating and shooting modes give users creative freedom to capture complex shots with minimal input. It’s worth noting, unlike the consumer-level gimbals in the Osmo Series like the DJI Osmo Mobile 2, manual editing is required following some of the shooting modes to produce the final product. If you’re looking for a flexible and easy to gimbal for your camera, will not be disappointed with the DJI Ronin-S.To discuss any information from the above post or any DJI or Freefly product, please give one of our team a call on 0191 296 1024 or email us at info@heliguy.com.
Keep checking back to Heliguy’s Insider Blog for more announcements, insights into drones and, of course, the latest news from the drone industry.


Leave a comment